Week 2- More ITC stuff

For those of you wondering, here’s what the TA Nano-ITC instrument really looks like!

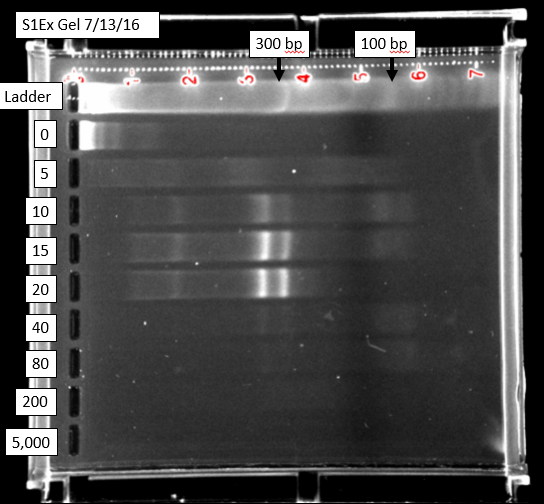
I had a disastrous start to week 2. On Monday, I was in bed for most of the day with a flu. However, things started to pick up on Tuesday. I started off by running the ITC machine on the DNA sample that I made last week. My job was to make the 3mM DNA-NaCl solution react with the 6mM Cobalt Hexammine solution(also made last week) and record the enthalpy changes that signify the two binding phases of DNA, i.e. the binding of DNA with Cobalt Hexammine and the subsequent condensation of the DNA molecule.

I started my experiment by loading the Nano ITC device with the reactants. I loaded the sample cell of the ITC machine with 300 µl of the DNA solution. Next, I loaded the buret syringe with 50 µl Cobalt Hexammine. The process of loading the buret syringe was extremely difficult and stressful the first time. I had to make sure that there were no air bubbles present in the Cobalt Hexammine solution contained in the syringe column. Not only that, I had to poke in a air bubble at the top of the liquid column using the plunger. I remember sweating profusely while desperately trying to pipette air bubbles out of the column! That was a time consuming process.

The next part was pretty straightforward.

 I just used the ITCRun software installed in the computer connected to the ITC device to operate the machine. I basically set all the parameters required for the reaction to proceed and the software did the rest. After equilibrating the sample solution for about 30 minutes, the ITC started emptying the Cobalt Hexammine,bit by bit, into the sample cell after regular intervals of 175 s. At the same time, the software plotted and recorded enthalpy peaks after every 175 s. 

Sadly, my first trial was a massive fail with the first few plots going horribly wrong. I’m assuming it was due to the presence of a massive air bubble at the tip of the syringe. 

Results from run 1

I re-ran the experiment with the same settings for a second time. Didn’t work this time either!
When you fail, you have to try harder. That’s what science is all about.
So, I reset the experiment for a third time and started the experiment with fingers crossed. And it worked this time!

Result from run 3

I re-modeled the raw data using the NanoAnalyze software to display the thermodynamic parameters involved with the experiment. This was necessary to prove the presence of two distinct binding phases of DNA. 

Remodeled data from run 3

In order to ensure consistency in the data I ran the experiment once more. The results from this run looked similar to the results from the third. Hence, this run was successful too!

Our next objective was to create a broader spectrum of peaks in between the two binding phases of the DNA. In other words, I had to figure out a way to shift the sigmoid curve towards the right and magnify it. I used the simulation mode in the NanoAnalyze software to devise parameters that would enable us to meet this requirement. I won’t go into details about how this simulation mode works. But here is a model that the simulation mode prepared for us:
 It recommended that I use a 5mM DNA solution for my next ITC run. I made a 5mM DNA-NaCl solution by dissolving 16.7 mg of calf thymus DNA in 10 ml NaCl. 
I ran this new DNA solution in the ITC with the 6mM default Cobalt Hexammine solution. Here are the results so far:

Results from 5mM DNA w 6mM Cobalt Hexamine run 1

The raw heat data displays a wider range of peaks between the binding phases. Hence it is safe to say that the experiment was successful. To confirm this, I remodeled the raw data using NanoAnalyze:

A perfect match with the experimental model from the simulation mode! 
This week has been an eventful one. Starting off with a few bad trials, I was eventually able to make things work and obtain much better results. A great end to week 2!

Week #2 MTW

So like I last mentioned, I did start off Monday by characterizing the DNA in Professor Thompson’s UV-Vis machine. The peak wavelength was at 527nm, this is a good sign. A solution with this peak wavelength indicates that the majority of the gold nano-particles are the size and shape that we want them to be. I then used a quartz cuvette in the UV-Vis machine to examine the DNA. The peak was then at 258nm which is a good place for the DNA’s peak to be. We also recorded the wavelengths at 260nm and 320nm. This was done because subtracting the 320 wavelength from the 260 wavelength can allow us to calculate the concentration of the DNA in the solution.

Next I began preparing for equilibrium dialysis. First I prepared some TEM buffer, which is like TE buffer but slightly different. It contains NaCl, Tris, EDTA, and water. This would be what is used to re-hydrate the solutions during dialysis. Then I did more calculations to find the proper ratio to mix the DNA and gold nano-particles together. Unfortunately (?) something must have gone awry, for the DNA and gold nano-particle solutions (which all SHOULD have contained exactly the same thing) looked very different.

It’s very clear that these solutions are not all the same. We decided to re-run these samples in the UV-Vis to try to identify where things had gone wrong. The UV-Vis showed us that the samples were all relatively the same, so we continued to equilibrium dialysis. For equilibrium dialysis we use big centrifuges located in Professor Thompson’s lab. The procedure calls for 40 minutes at 3000rpm. Unfortunately, I ran the first 40 minutes at 3000rpx (?) which is roughly 5000rpm. This is much more forcible then what should be used, and likely caused the DNA to crash out. After the first spin it looked like this:

To me, this looked pretty normal. The pellet is not very big, but is definitely noticeable. The supernatant was then siphoned off and the solution was rehydrated with TEM buffer. The second run, I was sure to set it at 3000rpm for 40 minutes. After the second run the solution looked like this:

It is very noticeable how small the pellets are and this concerned me. I then siphoned off the supernatant and re-hydrated the solution with TEM buffer and ran the solution at 3000rpm for 40 minutes in the centrifuge one last time. After this last run, the pellet was almost unnoticeable. Regardless, I siphoned off the supernatant and re-hydrated the solution. Because the pellets were so small on the second and third runs, we figured that something was wrong. To try to find what had gone wrong, we decided to run everything in the UV-Vis machine again. After getting the results back, it appears that the first run at 3000rxm had in fact caused the DNA to crash out.

Week #1

Introduction to Lab requirements and goal

The first week working with Dr. Andresen was a great success and great experience. We started our Research with a basic understanding of what our goal was and proper ways to work in an environment where all data must be collected and solutions must be carefully made.

Monday, May 15, 2017

On Monday I met with Professor Andresen and his summer research group to discussed the plan and the goal for the research that we are investigating. We went over the basic requirements that we need to accomplish such getting keys to lab room so we can have access when Professor Andresen can’t make it. We also went over the websites that our group must used in order to keep track of our progress and find preparation guides for solutions that we might need in the near future. This website is called lab wiki and we can find useful information on how to specifically do a solution and it also gives us the freedom to create our own page where we can post a guide on the techniques that we used to create a specific solution. I was given Abby’s and Sarah’s work book to gather information on their procedures and work done previous summer’s. I was also given articles and books related to the cell and specially Nucleosome Core Particle to learn more about how the cell works and the role of DNA.

Tuesday, May 16, 2017

On Tuesday I made 50ml of 1 Mole stock of Na-Cl which is about 2.922g. After creating this solution I added the Na-Cl into a disposable container  of 50mL and label it with the name of the solution, my initials and the day it was created. This was also done to 1 M of Magnesium Chloride hexahdrate and I used 10.165g of stock  creating 50ml. After creating this solution I went to the wiki page and look for the preparation of Tris-HCl. Printed our the instructions and taped them into my workbook, and I made the solution following each step with the help of Professor Andresen, since I was dealing with powerful acid that I wasn’t used to work with. This was done through out the day, seeing how I was learning how to used the proper techniques and tools to complete each task, this was all done with the help and guidance of Professor Andresen.

Wednesday, May 17, 2017

I started out my day by creating 50ml of EDTA with about 1/2 molar, this translate to 9.3004g of stock. On this day Professor Andresen added NaOH to get the content to an pH of 8.0. While the Professor was doing this, I was left the task to make 500ml of KTM, Ml, and DB solutions. Each solution contain different components such has Tris-HCl, NaCl, and MgCl2. The procedure in making this solutions can be found in documents provided by previous research members. This solutions and data took the entire day, careful measurements were made and tools used were washed to keep a clean laboratory and environment.

Thursday, May 18, 2017

I was left with the task to make more Tris-HCl with pH of 7.5. From what I learned from Professor Andresen, I took careful measurements of the amount of HCl I added to the Tris-HCl in order to control the pH to be 7.5. I also was very careful in handling HCl, by wearing protective gloves and plastic glasses. After creating 50ml of Tris-HCl, I added the procedure to make EDTA onto wikipedia. After this was done I helped Dylan when using the UV-VIS machine, but we encounter some software problems that created problems in our solutions for the nano-particles. The time I had between projects, I read over all the documents that I still had from Professor Andresen, and read more about the structure of DNA in a cell.

Friday, May 19, 2017 

On this day we started by having a group meeting with Professor Andresen and my colleagues. This group meeting was to inform Professor Andresen about our progress in our work and an overview of what we had done during the week. On this day we also got information on software that will be helpful in future research of scientific articles and citations. When this was one, my colleagues and I went to the Science Center to shred DNA and we took careful notes on every step we did. When this was done we launch the DLS machine and got results from the nano-particles with used. During this time we also got more nano-particle from last summer that Savana was using, and to finish the day off I spend relocating the nano-particles into new containers and reading useful articles that Professor Andresen provided, in order to prepare for next week.

Week 1- Isothermal Titration Calorimetry

The first week of my research with Dr. Andresen started with some detailed study about the Nano Isothermal Titration Calorimetry (ITC) technology. The basic idea of our research project is to figure out the thermodynamics associated with DNA condensation by Cobalt (III) hexamine binding. Fundamentally, we are trying to reproduce the results from another similar experiment that deals with the enthalpy change of DNA condensation.

Day 1: Monday, 15th May, 2017

I started out by watching youtube videos on how the Nano ITC machine works. ITC is a technique that deals with a wide variety of bimolecular interactions. It directly measures hear either released or absorbed during a biomolecular binding event and it is extremely sensitive to very small heat changes. The Nano ITC machine consists of two identical cells, made of gold due to its inertness and high thermal conductivity. These cells are surrounded by an adiabatic jacket. The instrument uses two very sensitive thermocouples, one in each cell to constantly monitor the temperatures of the cells. The temperatures of the cells are kept equal. The heat supplied to the sample cell will be lass than the heat supplied to the reference cell if the reaction is exothermic and vice versa.

Day 2: Wednesday, 17th May, 2017

Wednesday was all about synthesizing the chemicals required for measuring the heat of dilution using the ITC machine. We were to measure the heat evolving from the dilution of cobalt hexamine using 10 mM NaCl solution. I started by making a 0.2 M Cobalt Hexamine stock solution. I then used the 0.2 M stock solution to make 10 ml of 6mM Cobalt Hexamine solution. Subsequently, I made 10 ml of 10 mM NaCl solution from a 1 M stock by dilution with water. I split the 10 ml solution into two tubes, one with 2 ml of NaCl and the other with 8 ml of NaCl (for the DNA solution).

Day 3: Thursday, 18th May, 2017

On Thursday, I used the Nano ITC machine to measure the enthalpy of dilution of cobalt hexamine. I had to be extremely careful while loading the syringe with 50 microliters 6mM Cobalt Hexamine, to make sure that there were no air bubbles inside. Fontaine helped me with loading the reference cell with 300 microliters of water and the sample cell with 300 microliters of  10mM NaCl solution. I had to be extremely cautious so that there were no air bubbles inside the cells. The presence of air bubbles in cells or the syringe can give erroneous results. The injection interval for the cobalt hexamine injection was set to 175 s, 20 injections in total. The ITCRun software was used to operate the instrument. The spin rate was set at 250 rpm and the temperature was held constant at 25 C. The solutions were allowed to auto equilibrate for 1564 s. After that, the syringe automatically started injecting 2.5 microliters of Cobalt hexamine solution after every 175 s intervals. The NanoAnalyze software was used to measure enthalpy peaks after each injection:

As evident from the NanoAnalyze model, the peaks are more or less overtime (except for that last peak which we discarded as an experimental anomaly). The heat evolved after each injection is measured by integrating the area under the curve. The normalized fit for integrated heat vs number of injections was also plotted using NanoAnalyze. Turns out, the normalized fit is not exactly sigmoid as we would expect it to be.
Day 4: Friday, 19th May, 2017

After the satisfactory results from our first test run of the ITC instrument, we decided to start making the DNA-NaCl solution with a concentration of 1 mg/ml. Dylan guided me through the processes of measuring out 8 mg of DNA using the analytical balance, dissolving the DNA in 8 ml of 10 mM NaCl solution and subsequently setting up the solution for DNA shearing. After we completed the process of DNA shearing, we refrigerated the resulting solution. A few hours later, I checked the pH of the solution for consistency. I measured the pH to be somewhere between 6 and 7. The next step would be to measure the enthalpy change of DNA condensation after it reacts with Cobalt Hexamine in the Nano ITC instrument (to be done on Monday). Earlier that day, Dylan also introduced me and Jose to the UV-Vis spectrophotometer and he showed us how to operate the device. Dylan also made demonstrations on how to operate the DLS machine. 

Week #1

We picked up this summer almost exactly where I left off my training with Savannah. Since I first started, the organization of the lab had been bothering me. Especially the bookshelf, I just did found the entropy to be too high. This is no longer the case! A very thorough cleaning has left us with several empty drawers, an alphabetized bookcase and an alphabetized cabinet of  samples. Additionally, I prepared all of the samples required to calibrate the ICP and the calculations required to do so. This process included massing several solutions and then diluting them to a specific concentrations. After I had done this Professor Andresen believed that I was qualified enough to write my very first Wiki article on the subject. The process of creating my very first wiki page was exhilarating, it feels almost like a child to me now. Today, Wednesday, I was almost able to set up the ICP machine by myself. My goal for today is to run the ICP on the samples that I prepared yesterday. Below is a picture from my notebook of the theoretically calculated masses of the samples I prepared and below the theoretical masses are the actual ones.

Thursday I worked with Jose and he taught me how to prepare the TRIS-HCl solution that I had used previously in my TE buffer. Later I taught him how to use the UV-Vis machine, although we ran into some troubles with it. Apparently the machine was attempting to connect to its thermal regulator however, there was non connected to the machine. Using this machine should of taken less then a half hour but through a series of mishaps it ended up taking at least an hour and a half with some professor guidance. I also helped Jose learn how to shear DNA. Originally we were doing this in Professor Frey’s lab, however she has since moved the Sonic probe and the DLS machine to the Pchem laboratory. This was a pretty good move to get this out of her office space, as the noise the probe makes is one of the most unpleasant things I’ve ever heard. 
Friday we kicked it off with a pretty productive group meeting that left everyone with a nice list of things that they could work on. My tasks included using the UV-Vis machine, helping Amlan shear DNA, using the DLS and Zeta machine. Towards the end of the day it was looking like I was going to accomplish everything until I found that my saved file on the UV-Vis machine was lost. Additionally, another student was now using the UV-Vis machine in Professor Thompson’s lab. I then returned to Professor Andresen’s lab to use the UV-Vis machine there. Unfortunately we were once again accosted with technological mishaps. We threw in the towel and decided to deal with UV-Vis on Monday morning. I ended my first week reading a very helpful research paper outside in front of the fountain. 

The End of the Line

This week was my final week of research this summer. I was very busy all week trying to get as much done as I could before I had to leave. On Monday I reran the DLS for the new cleaned DNANP samples and saw the same dramatic increase in size following cleaning. We still do not know why this phenomenon is occurring in the new samples but was not seen the original (10 ug/mL) sample. There are not any obvious signs of too much aggregation in the salt-TE cleaned samples so it is unclear why the phenomenon is occurring at all.

Then I ran ICP-OES on 10x and 1x dilutions of the supernatant and DNANP samples. A preliminary look at the ICP data revealed that the phosphorous concentration (2 phosphorus=1bp of DNA) was far below the detection limit even in the 1x sample. I then concentrated the remaining 10 ug/mL DNANP sample by 8x in order to hopefully get at least one measurement with detectable phosphorous. Even with the increased concentration the phosphorous was still undetectable. I will likely need to start from the beginning with a lot more sample so that I can concentrate the final sample by a larger factor but I will not be able to try that until the fall. With the remaining time this week I made and ran a new ICP calibration that covered sodium concentrations less than .500 ppm. This was applied to my water washed samples to hopefully determine whether any significant amount of sodium remained bound to the DNANP complex. I also reran the 10x and 1x dilutions to get more data. Today I have been working on compiling and analysing the data from the ICP. There seems to be a great deal of fluctuation and error in the ICP measurements which is concerning.
                                  

More Spinning and a Wee Bit O’ Fun

I didn’t have ICP gas to run my samples from last week spin cleaning so instead on Monday I ran UV vis on the supernatant samples to confirm that the free DNA concentration decreased with each spin. The free DNA in solution plummeted after the first spin so I am confident that the spinning protocol is enough to clean the free DNA out of the solution leaving only bound DNA- NP complexes.

This was Sarah’s last week so on Wednesday we took time out of the day to get lunch and ice cream. Since this took most of my day on Wednesday I did not try to start another spinning procedure until Thursday. I prepared 4 new DNA-NP solutions with new concentrations of DNA (20 ug/mL, 30 ug/mL, 40 ug/mL, and 50 ug/mL), characterised them and repeated the cleaning protocol with 3 washes of TE-10 mM NaCl and 2 of pure water. Similar to last week I saw much more aggregation following the water washes than with the salt TE. The UV-vis data showed very little shift in the spectra but a decrease in concentration and an increase in aggregation following the washes. The most interesting part of the characterisation data was that the six of the particles jumped from ~60 nm prewash to ~80-100 nm after being washed in the salt and the water. The jump in size was most pronounced in the lower concentration. The 50 ug/mL sample was back down at ~66 nm. This is interesting because no jump was seen in the samples from last week which could be due to subtle differences in the procedure or the fact that a different sample of sheared DNA was used. Next week I will run ICP which should give me more insight into the complexes.
                       

July 20th – My Last Day in Lab!

Today is my last day in lab for the summer. In the beginning of June, I began by ordering a stock of whole chicken blood, and proceeded to purify this stock throughout the summer. For the past few weeks in particular, I had been working on running gels to digest the sample with the correct amount of micrococcal nuclease. This week, I correctly digested both of my samples, so they are now ready to be run in a column to isolate the mononucleosomes. In the fall, I look forward to further purifying my samples until I just have mononucleosomes, and running electrostatic experiments on them!

July 18th – Gels, Gels, and More Gels

For the past several weeks, I have been working on “digesting” my sample, and running sample os varying degrees of digestion with gel electrophoresis. The first step of the process is to do a “trial digest,” in which different concentrations of micrococcal nuclease are added to the nucleosomes. Micrococcal nuclease effectively “eats” the DNA, slowing down when it approaches the histone core. A higher concentration of micrococcal nuclease will “eat” more DNA, so the optimal amount that will digest only the linker DNA is sought.

Next, proteinase K is added to the nucleosomes, which digests the histone proteins. There is now free DNA in the sample, and its length is determined by the amount digested by the micrococcal nuclease. Gel electrophoresis can be done on the variously digested samples to qualitatively see how long the DNA is for each micrococcal nuclease concentration (proteinase K concentration stays the same). The goal of this “trial digest” procedure is to determine what concentration of micrococcal nuclease digests just the linker DNA, so that all we are left with in the sample is the histone core and DNA wrapped around it. It is known that there is approximately 146 bp of DNA around a histone core (without the linker DNA).

It took several attempts to get a successful gel though. Examples of successful and unsuccessful gels are below.

This gel is an example of a gel that was not successful. It is a good gel in regards to the quality of the 10 bp DNA ladders (in the first and last lanes), but the samples are all trapped in the wells, rather than moving down the gel like the DNA ladder did. Such behavior could be explained by improper digestion, perhaps because of the micrococcal nuclease itself, its digestive medium, or other factors.

This gel is an example of a successful gel! Although the DNA ladder is not as clear as the gel above, the samples did not stay in the wells, and instead, moved down the gel depending on their length. It is interesting, though, that a majority of the digested samples have a length of approximately 300 bp (double what it should be!).

Because the 40 units of micrococcal nuclease seemed like the optimal concentration to digest the DNA, the sample was digested with this concentration, and compared in another gel to the prior undigested sample (see image below).

This gel contains the DNA ladder (not very clear), the digested sample, and the undigested sample. It is good that there is a stark difference between the digested and undigested sample…but where exactly is the undigested sample? Is there DNA there, is it over digested, or does the concentration of DNA in the gel sample need to be increased?

Endless Spinning

The goal this week was to clean all of the unbound DNA out of a stable DNA-nanoparticle solution so that we can quantify the amount of DNA per nanoparticle. Due to the results we saw last week we used 10 ug/mL DNA in the same 0.3 nM CTAB gold nanoparticles. The protocol we came up with was to spin down the nanoparticles and then do 3 washes with TE+10mM NaCl followed by 2 washes with pure water. While doing this I encountered some aggregation and incomplete pelleting. The aggregation was reduced after each spin indicating that the spinning was clearing out any unstable particles from the solution. The incomplete pelleting was combated by spinning the collected supernatant 1-2 extra times and collecting the extra pellet and a hopefully clean supernatant. The result of this protocol modification was 3 times as many spins. Each spin took 40 minutes so the protocol took two very long days to complete. The result was two DNA-nanoparticle samples a sample washed by salt-TE buffer and water and a sample washed only with salt-TE. More aggregation was seen after adding cleaning with the water indicating that either the salt or the TE buffer is integral in maintaining the stability of the nanoparticle complexes.

I was going to start measuring the samples in the ICP but we were out of the argon and nitrogen gas. Instead I made 7 more sheared DNA samples, ran UV-vis on them and attempted to run them in an agarose gel. The UV-vis showed normal DNA spectra with DNA concentrations between 0.3-0.6 mg/mL. The agarose gel did not work and will need to be done again next week.
Failed gel